
Easy Molten Chocolate Lava Cakes: Irresistible Dessert Delights
 Chef Emily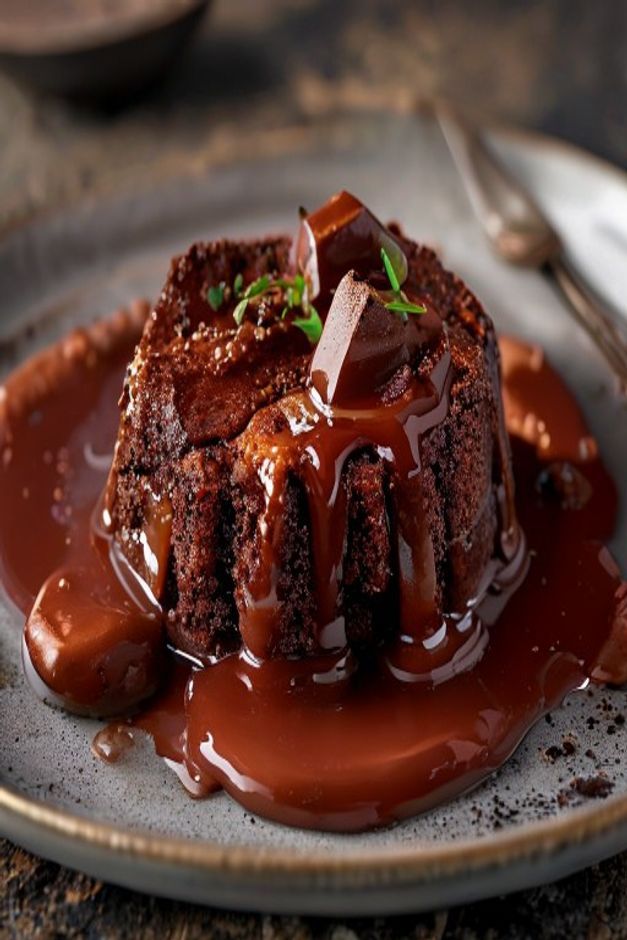
Indulge in easy molten chocolate lava cakes, the perfect chocolate dessert. Rich, gooey, and sure to impress at any occasion!
🎙️ Hands-free — steps read aloud as you cook
The Allure of Chocolate Lava Cake
Imagine a dessert that promises to satisfy your chocolate cravings with each decadent bite. The chocolate lava cake, with its rich and gooey center, has earned a rightful place in the hearts of chocolate lovers everywhere. This delightful treat is not only a feast for the taste buds but also a visual spectacle, as the molten chocolate flows from within like a sweet, velvety river when you cut into it. Whether you serve it at an intimate dinner or a grand celebration, chocolate lava cake is sure to impress.
Creating the Perfect Chocolate Lava Cake
To craft the ultimate chocolate lava cake, you need a handful of simple ingredients, each playing a crucial role in creating that perfect texture and flavor. The foundation is built on high-quality dark chocolate and unsalted butter, which come together to form the luscious base of the cake. Sugar adds sweetness and helps achieve that delicate balance, while eggs provide structure and richness. All-purpose flour ensures the cake holds its shape, and a pinch of salt enhances the flavors and rounds out the sweetness. With these ingredients at hand, you’re just a few steps away from enjoying this irresistible dessert.
Start by melting the butter and dark chocolate together in a mixing bowl. This mixture should be smooth and glossy, signaling that the chocolate has fully melted. Once combined, add in the sugar and whisk until it’s fully incorporated. The next step is to introduce the eggs, which will help create that luscious texture. Whisk in the eggs until the mixture becomes light in color and slightly fluffy. This is the moment to sprinkle in your flour and salt. Gently fold the dry ingredients into the chocolate mixture, being careful not to overmix, as you want to keep that airy texture.
Now comes the fun part: pouring the batter into greased ramekins. This is where your cakes will take shape. Fill each ramekin about 3/4 full, leaving enough room for the molten center to flow freely. Pop them into a preheated oven and let the magic happen. The key is to bake them just until the edges are set while the center remains gooey. After around 14 minutes, the aroma of chocolate will fill your kitchen, and you’ll know they’re almost ready.
When the timer goes off, it’s essential to let the cakes rest for a minute before serving. This brief waiting period allows the exterior to firm up while keeping the center delectably molten. The moment of truth arrives when you turn the ramekin upside down onto a plate. With a gentle tap, the cake should release, and as you lift the ramekin, the molten chocolate center will ooze out—an eye-catching and mouthwatering sight!
To elevate your chocolate lava cake experience, consider garnishing it with a dusting of powdered sugar, a scoop of vanilla ice cream, or a few fresh berries. The contrast of cold ice cream with warm, gooey chocolate is simply divine. Indulging in this dessert is not just about taste; it’s about the entire experience of creating and sharing something special with loved ones.
Tips for Success
In my years of perfecting molten chocolate lava cakes, I’ve discovered a few secrets that make all the difference. First, never skip the step of properly greasing your ramekins. I love to use butter and a light dusting of cocoa powder to ensure the cakes release beautifully every time. The cocoa powder has the added benefit of preventing any white flour marks from showing on your finished dessert.
Temperature control is absolutely crucial when working with chocolate. I always melt my butter and chocolate using a double boiler method rather than microwaving, as it gives me more control and prevents scorching. If you must use a microwave, do it in 20-second bursts and stir vigorously between each one. The moment you see even a hint of graininess in your melted chocolate mixture, you know it’s gotten too hot.
Timing is everything with lava cakes. In my kitchen, I set a timer for 12 minutes and then check every 30 seconds thereafter. The cakes continue to cook slightly after being removed from the oven, so it’s better to err on the side of underbaking. When the edges look set but the center still jiggles slightly when shaken, they’re perfect.
I’ve learned that room temperature eggs incorporate much better into the batter than cold ones straight from the fridge. About 30 minutes before baking, I take my eggs out to warm up. This small step makes the batter smoother and helps achieve that perfect molten center. If you forget, you can place the eggs in warm (not hot) water for 5 minutes to quickly bring them to temperature.
One final tip I swear by is making the batter ahead of time. The flavors actually develop better when the batter rests for about an hour in the refrigerator before baking. This also gives me time to clean up and prepare other elements of the meal before dessert time arrives.
Variations & Substitutions
While traditional chocolate lava cakes are divine, I love experimenting with different flavor profiles. For a Mexican-inspired version, I add a pinch of cinnamon and a tiny dash of cayenne pepper to the batter. The warmth of the spices plays beautifully against the rich chocolate, creating a dessert with surprising depth.
For friends with dietary restrictions, I’ve found some excellent substitutions that work beautifully. Gluten-free all-purpose flour blends work perfectly as a 1:1 replacement for regular flour. When making dairy-free versions, I use high-quality vegan butter and dairy-free chocolate. The results are so good that no one suspects they’re eating an adapted recipe.
Chocolate choice makes a huge difference in the final product. While the recipe calls for dark chocolate, I sometimes use semi-sweet or even milk chocolate for a sweeter, milder flavor. Just remember that milk chocolate contains more sugar, so you may want to reduce the added sugar in the recipe by about 25% to maintain balance.
For special occasions, I like to add different liqueurs to the batter. A tablespoon of Grand Marnier creates a sophisticated orange-chocolate flavor, while a dash of raspberry liqueur makes for a fruity twist. If you prefer non-alcoholic versions, try adding a teaspoon of high-quality extract like peppermint or almond instead.
Serving Suggestions
Presentation elevates the lava cake experience from great to unforgettable. I love serving them on simple white plates to let the chocolate flow take center stage. A light dusting of powdered sugar through a fine mesh sieve creates an elegant snow-like effect. For a dramatic flourish, I sometimes use cocoa powder and a stencil to create patterns on the plate before placing the cake.
The classic pairing is vanilla ice cream, but I encourage you to think beyond the ordinary. A scoop of homemade coffee ice cream creates a mocha sensation that chocolate lovers adore. In summer, I serve the cakes with a quenelle of coconut sorbet for a tropical twist. The contrast between hot and cold is what makes these combinations so magical.
Fresh fruit not only adds color but cuts through the richness beautifully. I’ve found that raspberries, strawberries, and blackberries work particularly well. For a restaurant-worthy presentation, I’ll arrange a few berries around the cake and place a single perfect berry on top with a mint leaf. A drizzle of raspberry coulis or caramel sauce adds both flavor and visual appeal.
For adult gatherings, I like to serve espresso or cappuccino alongside the lava cakes. The bitterness of the coffee balances the sweetness and makes for a sophisticated pairing. A small glass of dessert wine like a tawny port or a Banyuls can also complement the chocolate beautifully. Remember, the goal is to enhance, not overwhelm, the star of the show – that glorious molten center.
Storage & Reheating
While lava cakes are best enjoyed fresh, I’ve discovered some tricks for storing leftovers that maintain their magic. If you have unbaked batter, it keeps wonderfully in the refrigerator for up to 24 hours. I simply cover the ramekins tightly with plastic wrap, then bake straight from the fridge, adding an extra minute to the cooking time.
For baked cakes you couldn’t finish (a rare occurrence in my house!), let them cool completely before covering tightly and refrigerating for up to 2 days. To reheat, I remove them from the refrigerator about 15 minutes before warming. Then I place them in a 300°F oven for about 5-7 minutes until just warmed through. This gentle reheating helps maintain that molten center.
Surprisingly, lava cakes can be frozen with decent results. I bake them as usual, let them cool completely, then wrap each ramekin tightly in plastic wrap followed by aluminum foil. They’ll keep for about a month in the freezer. To serve, I remove the wrapping, place the frozen cake in a cold oven, then turn it to 325°F and bake for about 12-15 minutes until heated through.
One important note – never microwave leftover lava cakes if you want to preserve that special texture. The microwave heats unevenly and can turn your carefully crafted molten center into an overcooked disappointment
Pro Kitchen Tips
💡 Use high-quality dark chocolate for the best flavor.
💡 Do not overbake; the gooey center is what makes the chocolate lava cake special.
💡 Prepare the batter ahead of time and refrigerate it for up to 24 hours before baking.
Frequently Asked Questions
Easy Molten Chocolate Lava Cakes: Irresistible Dessert Delights
Interactive recipe card — scale and check items as you cook!
Ingredients Needed
Instructions
Preparation
Cooking
Serving
📝 Notes
These cakes are best served immediately for that molten center experience.
🍎 Nutrition (per serving)
* Nutrition is an estimate and may vary by ingredients/brands.
Reviews (106)
⭐ Did you make this recipe? We'd love to hear how it turned out — leave a quick rating below and help other home cooks!


Leave a Review